Other software calls
Halcon
About the GenICam protocol
Sizector®3D Camera S028 Product Series and S162 Product Series are GenICam™ compliant. The GenICam (Generic Interface for Cameras) standard aims to provide a common programming interface for various devices (mainly various industrial cameras and cameras), that is, various physical interfaces (such as GigE Vision, USB3 Vision, Coaxress, Camera Link HS, Camera Link, etc.) provide the same application programming interface (API). In theory, other vision software that supports the GenICam standard can control the 3D camera, but it has not been fully verified due to limited conditions. The following provides a connection example method for the third-party machine vision software (Halcon) commonly used in the market.
Install and decompress the latest version of MPSizectorS SDK and run the Halcon sample code
a) Install MPSizectorS SDK (MPSizectorS V2.21 or above is recommended) and Halcon (V18.11 or above 64-bit version is recommended, 32-bit version is not supported yet).
b) Set environment variables, taking Win10 as an example, computer [Properties]->[Advanced System Settings]->[Environment Variables]->Variables. The value of "HALCONROOT" is changed to "Program Files\MVTec\HALCON-18.11-Progress". As shown in the picture:

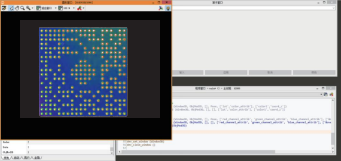
c) Open the "02_Binary->05_SizectorS_GenICam" folder in sequence and run [MUST]SetEnviroment-Path. Open the "Demo_Halcon" folder and run the "SizectorStart" file. Press "F5", the camera will shoot continuously, as shown in Figure 3.61.
Halcon control the camera to collect freely
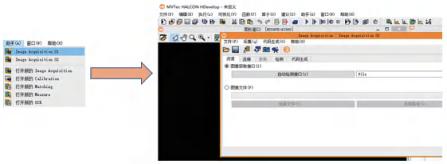
①Double-click the Halcon icon to enter the Halcon main interface, as shown in Figure 3.62.

②Left-click [Assistant (A)], left-click [Open New Image Acquisition] to enter the Image Acquisition Z interface, as shown in Figure 3.63.
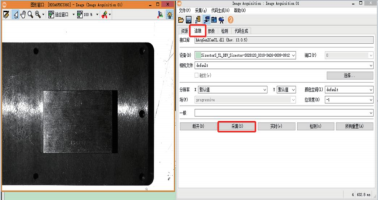
③Change parameters, click "Automatic detection interface", or manually change "File" to "GenICamTL", as shown in the red box below.

④Click [Connect] to enter the connection page, click the [Collect] button, the camera triggers to capture images. As shown below: